I took a break from this website for a while. I went to Europe, made new plans for my career, and got bogged down in election turmoil.
All those can be posts for another time. Let’s get back to eating (and living) for a better future, a cause for which I am even more committed than ever.
I’ll admit to often feeling like my posts weren’t doing anything, so it wasn’t inspiring me to keep writing and drawing. Despite that, I continued cooking and learning, and I will keep sharing what I learn. We can each create change in our own small ways, and I will do my part to contribute positive action and motivation.
My latest experiments have been with aquafaba (the liquid or brine from beans, usually chickpeas). I kept hearing about this new miracle ingredient used to replace egg, even for meringue, and saved it faithfully from each can of chickpeas used. Inevitably, I wouldn’t get around to making something with it, and the liquid would get tossed out.
This time, after a chickpea spree making chana masala, I had enough for at least 3 recipes. Only 3 T = 1 egg.
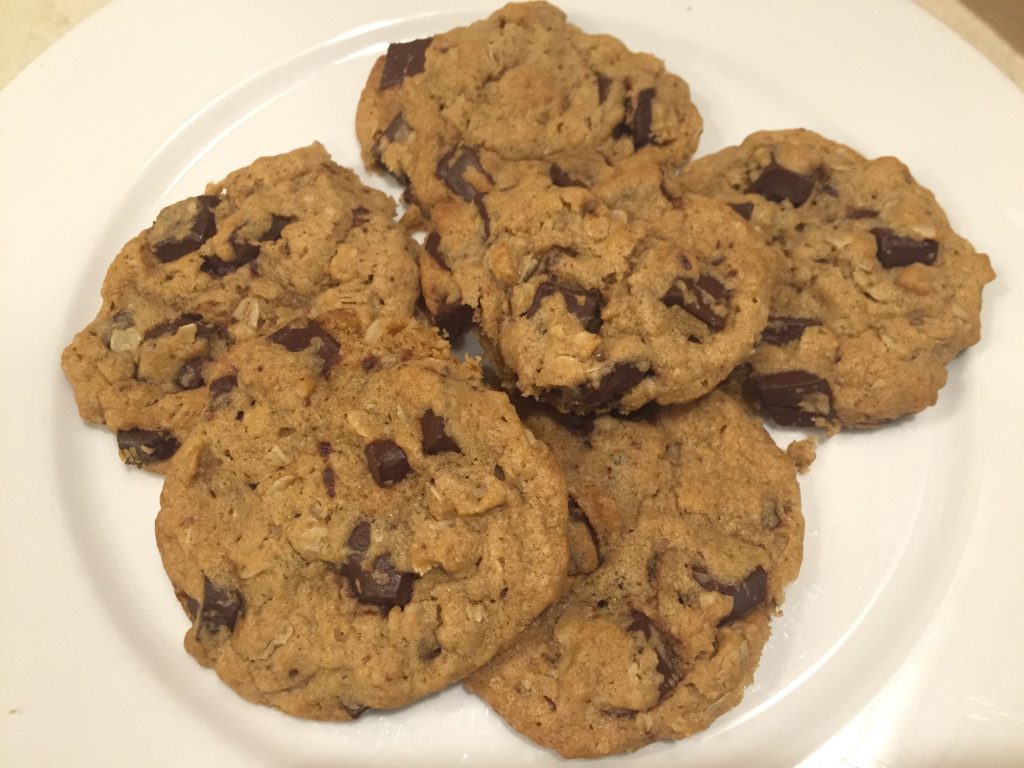
The first recipe, a new chocolate chip cookie recipe blew me away. I am used to my tried and true recipe using flax seed. It tastes very healthy, is a bit dry, and people like it but it is not as good as this one. The omni cookie batter tastes better before it is baked. This one tastes equally as good raw or baked.
My new favorite is based on this recipe. My only recipe changes were: I had to used Earth Balance buttery spread instead of vegan sticks. Later I read that they advise against it. I also added about 1/2 cup of oatmeal since they suggested adding more flour if the batter is a bit wet. It seemed like it needed a little more dry ingredients so I tried that.
These new cookies are the bomb. I don’t usually even use that phrase. You would never guess that they are vegan. So, so, so tasty.
Favorite animal-friendly chocolate chip cookies
1/2 cup vegan butter at room temperature (earth balance buttery sticks or similar)
1/2 cup packed brown sugar
1/4 cup white sugar
1/2 teaspoon baking powder
1/2 teaspoon baking soda
1/4 teaspoon salt
1 teaspoon vanilla extract
3 tablespoons aquafaba (from a can of chickpeas, or the liquid from any other can of white beans)
1 cup plus 2 tablespoons all purpose unbleached flour (or whole wheat pastry flour, for GF use all purpose flour GF flour plus 1 teaspoon xanthan gum)
1 to 1 1/2 cups vegan chocolate chips
Optional 1/2 cup oatmeal
Preheat the oven to 350 degrees F. In a mixing bowl, cream the butter and the sugars with an electric beater. Add the baking powder, baking soda, salt, vanilla and aquafaba. Beat to combine.
Add the flour and beat until well mixed. If the cookie dough seems too wet, add an additional tablespoon or two of flour or 1/2 cup oatmeal and mix till combined. Fold in chocolate chips.
Spoon rounded tablespoons onto a baking sheet. Bake for 10-12 minutes or until golden. Let cool on baking sheet for 1-2 minutes. Transfer to cooling rack to cool for several minutes more. Store in an airtight container for up to five days. Makes about 24 cookies.
I am in love with this Cheesy Mac recipe. Not only is it creamy and delicious, it is healthy and easy! I’ve made it twice so far, and tested it on 4 unique picky kids (well 3 are really picky), and one very honest husband. It has received high marks from everyone.
Cheesy Mac
Ingredients
10 ounces dried macaroni or other pasta (or about 2⅔ cups)
3 small yellow potatoes (about 1 cup)
1 carrot, diced (about ½ cup)
½ onion, chopped (about ½ cup)
¾ cup water (preferably use liquid from pot of boiled veggies)
½ cup raw cashews
¼ cup coconut milk
2 tablespoons nutritional yeast flakes
1 tablespoon lemon juice
1 teaspoon salt (or more to taste)
¼ teaspoon garlic powder
¼ teaspoon paprika
¼ teaspoon turmeric
Instructions
Bring 3 cups of water to boil in a small pot. Cook the potatoes, carrots, and onion in the boiling water for about 10 minutes, or until vegetables are tender and soft.
While the vegetables are cooking, add all the other ingredients (except veg water) to a high speed blender. Add the veggies at the end when they are soft enough to blend, using a slotted spoon to remove them from cooking water. Add ¾ cup of that cooking water to your blender and blend until smooth.
Cook macaroni in a large pot of boiling salted water according to package instructions (al dente). When finished, drain, and put back in the pot. Pour the cheesy blended sauce over your cooked macaroni noodles, stir, taste for salt, and serve immediately.
Optionally, place macaroni mixture in a baking dish, sprinkle with bread crumbs, and bake at 350 degrees Fahrenheit for 15 minutes, or until crumbs are turning golden brown.
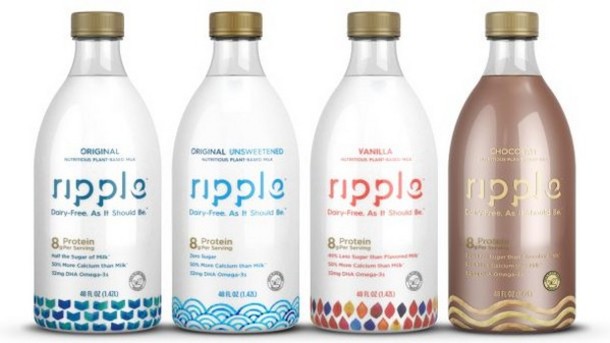
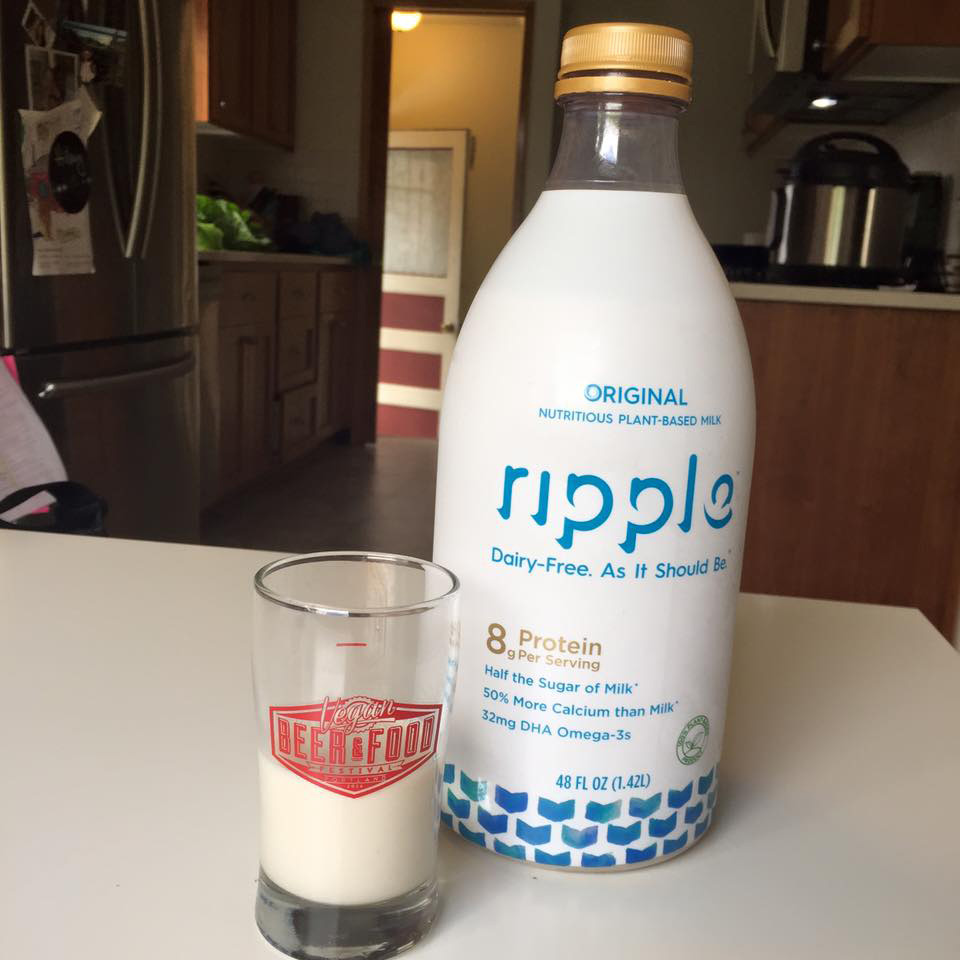
Ever since we read about Ripple Milk, we were intrigued! We sample a lot of non-dairy milk, but tend to stick to the 12 pack soy milks available from Costco just as that is easier, and we all like it. I personally find coconut milk a little slimy, and Jonathan objects to almond milk because of almond’s water intensive needs (although actually there is very little almond in store-bought milk).
Hemp is my second favorite, but is too expensive. I can’t stand rice milk- way too thin, and separates out in coffee (my main use). It is okay for cereal.
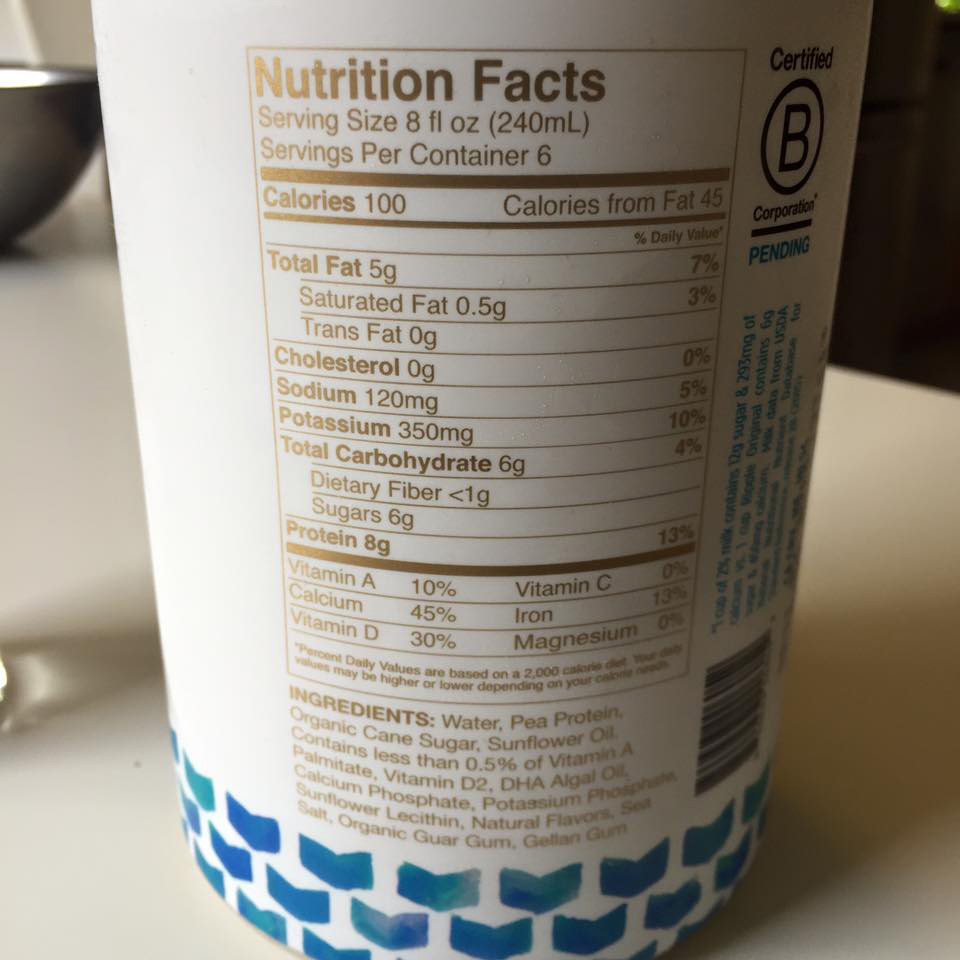
Ripple milk is made using pea protein, so it is great for those with allergies to soy, dairy and nuts. It has 20% fewer calories, less saturated fat and half the sugar of dairy. It has eight times the protein of almond milk. It also very healthy for you as it contains 32 mg of long-chain omega-3 fatty acid DHA (from microalgae), it has vitamins and minerals: 45% of the DV for calcium, 30% DV for vitamin D, and 13% for iron.
I found it at Whole Foods and liked the fun packaging. It cost a bit initially more than the standard non-dairy milks at $4.99. However, you can find a coupon for $1 off which makes it more comparable. I personally liked the taste. The kids and Jonathan were not as enamored. I found that we have really stopped drinking milk on it’s own- using it only in cereal, recipes and coffee. This created a slight problem of us not really using it quickly. Because it was a little more expensive, I was saving it for drinking rather than just adding it into whatever we normally do.
I think for younger kids who like to drink plain milk and people looking for a healthy milk option, it would be worth trying. Especially as it comes down in price hopefully. I will check on the Target price and see if that makes it more affordable. Although they purposefully wanted to avoid doing tetra packs, and it emulates cow milk in some regards of look and taste, I like how we can store tetra packs of milk and have them on hand.
The milk could be followed by yogurts, creamers, cheeses and more- making it a big game-changer in the plant-based arena. Just don’t call it “pea milk” please…
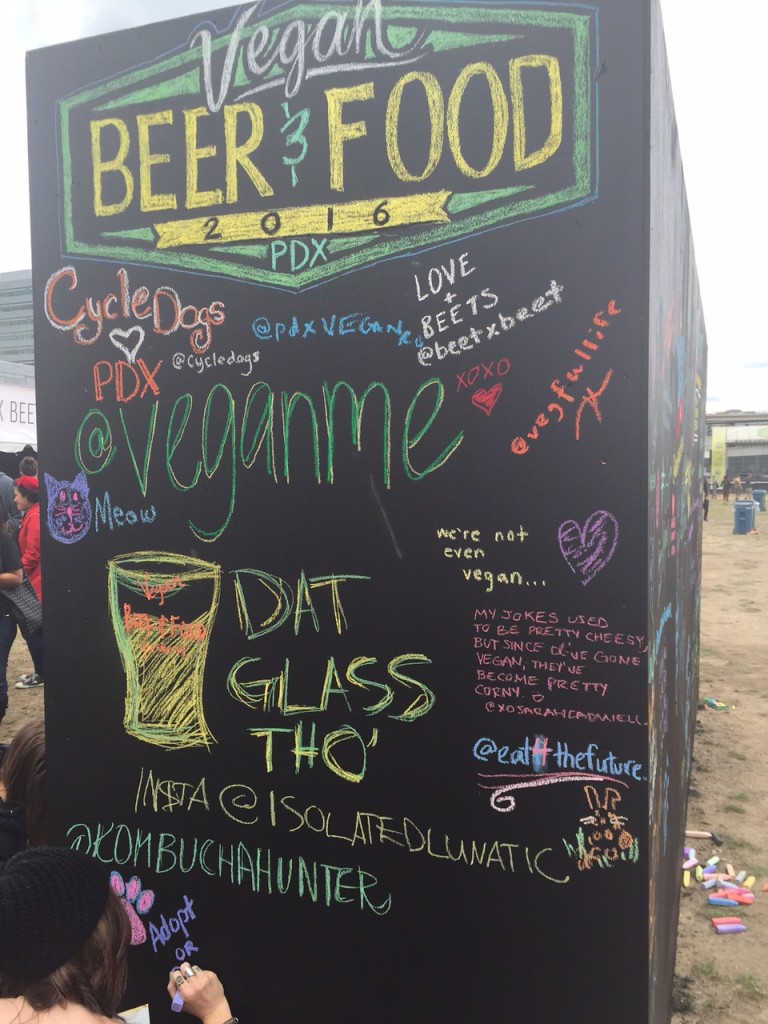
Last weekend was really busy with the Vegan Beer & Food Festival, and the Old McDonald’s Open House on Saturday, then brunch with friends on Sunday. It was very fun and I love having a lot going on. However, the morning before the festival as I went to the bank for $ for the festival, two stores for items needed for the Open House, picked up 30 pounds (total) of cherries and apples from a “fruit and veggie” guy from Eastern WA, and our local CSA for leafy greens- all before 10:30am, it seemed a bit energetic.
Vegan Beer Fest started in LA, and this is their second time coming to Portland. They have music, vegan booths selling items, many food and drink booths (some from LA, some local).
Last year I had been very interested in going to the Vegan Beer Fest, but didn’t end up going for a few reasons:
1) I couldn’t find anyone interested in going with me. I think because of the word “Vegan”. Really? It’s BEER- vegan or not, these are local great beers.
2) Tickets were $45-65 to get in, and that includes drinks but not food.
3) I don’t really like beer.
4) I don’t really like hipsters- and that seemed to be the majority of the crowd based on photos.
So, you can see why spending $45 to go alone but be surrounded with hipsters and drink mostly kombucha didn’t really appeal to me.
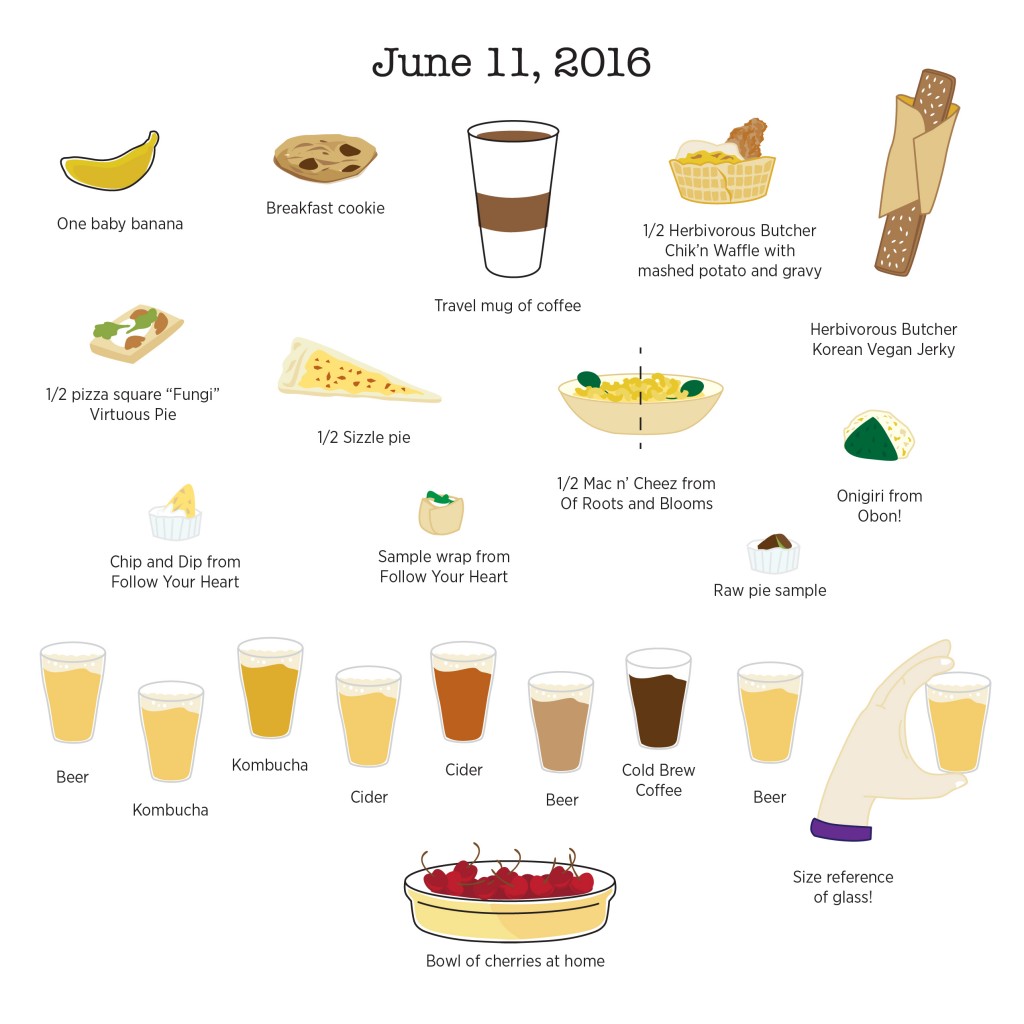
This year, I scored a half-price ticket early on, but then was invited by a printer friend who I work with to go as a VIP. Going early was really nice, since there weren’t lines at any of the food and drink booths. Except one: Herbivorous Butcher, a brother/sister team from Minneapolis was there. It was the one food booth I was really set on trying, and we decided to go there first. They have been wildly successful, based on the press I have read making their homemade vegan meats and cheeses. They had two items they were selling: one was a couple of deep-fried chicken pieces in mashed potatoes with gravy, inside a waffle cone ($11). I also ordered their Korean beef jerky ($5). The owners were there, and they were actually very cute, nice hipsters.
My friend has been vegetarian for over 20 years, so she has actually forgotten what meat tastes like. I don’t think this seitan meat was exactly like meat, but it was delicious with the crispy, spicy breading and textures. We barely finished that, it was a lot of food. I saved the jerky for later.
After that, well, I won’t go into each beer, cider and kombucha we tasted for now- mostly because I lost my list. Oregonic Tonic stood out for me in the kombucha. I tasted a lot of delicious beers and ciders. There were many fruity options, which worked well for me. And the fact that the glass was only 3 oz, was really nice. We were given 20 beer coupons to get in (the kombucha and coffees are free), apparently I only had 9 beers and ciders, so my illustration is actually off by three drinks.
As for food, we split everything which really helped us be able to try more things. You can see everything we tried in the illustration.
My only regret is not being physically able to eat more- especially missing dessert. We left after only 3 hours, if we stayed longer, we could have eaten a lot more. There is only so much one can eat and drink in a few hours!
It was definitely worth going this year, especially being invited as a business vendor. And shout out to CCL Label, who does very high-quality digital labels at their local Oregon press. Otherwise, I still think I might go, but only with half-price tickets because of my small drinking capacity, and definitely with some friends to share the food.
Earlier this month I posted about being hosted by non-vegans. This post is about being the host.
I’ve been really slacking lately on having people over. In the first few years of eating plant-based, all my standard “go to” recipes no longer could be used. My previously popular seafood stew was always so delicious and easy, but definitely not going to be in the new rotation. Even brunches were a challenge at first without my hash brown/sausage/egg/cottage cheese casserole. In the beginning my cooking skills weren’t the best, and I am not sure I even represented vegan meals very well. I particularly remember a lasagne that used tofu instead of ricotta that I made for the very first time when we had company… it was not that great.
Now, I’ve had several years practice, and have found that not emulating meat, or making something dependent on animal products is usually best. There are plenty of great options found globally that are naturally vegan- such as Lebanese, Ethiopian, Thai, Vietnamese and of course Indian.
Last night we invited around 24 people at our house for an Indian dinner party. It was a big deal for me since I am intimidated apparently by inviting more than one or two families to our house at a time. I wanted to make it a vegan meal, but also appealing to everyone coming since none of them are vegan.
I chose an Indian theme, since that is my personal favorite. Also, because I am fortunate to know a talented Indian friend who loves to cook.
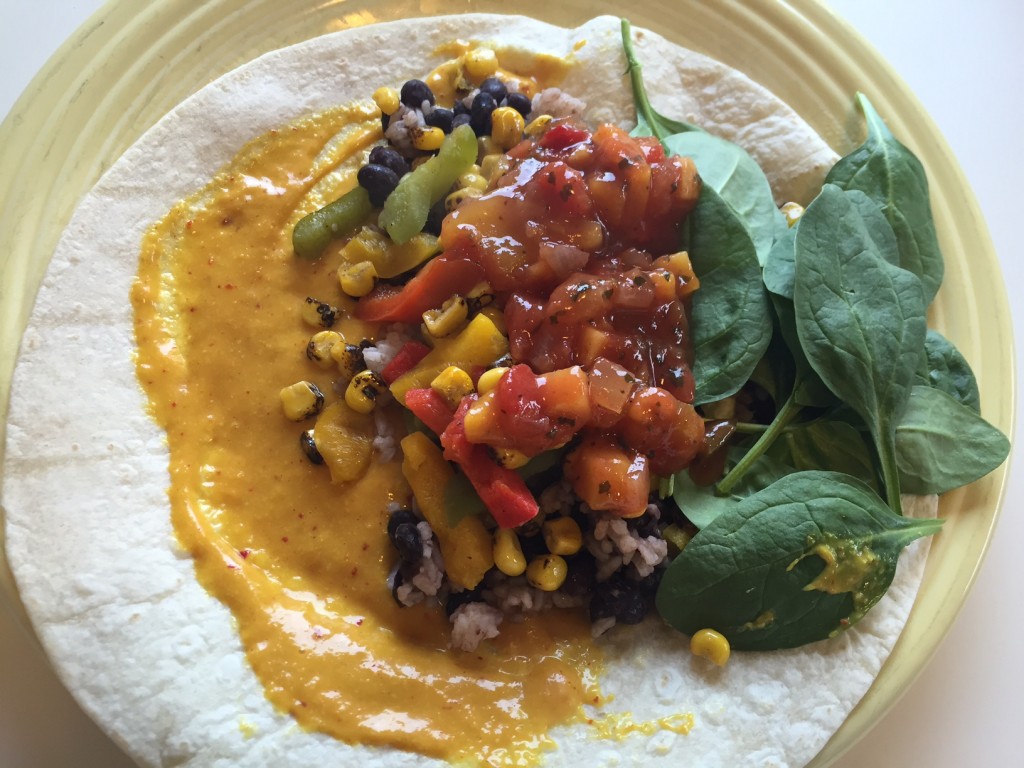
Everyone replied so enthusiastically to the idea, it was very gratifying. Most people brought their own dish: chana masala, red lentil dal, beets, and mini samosas. My friend and I had made; an Indian stew using white sweet potatoes, asparagus, carrots and coconut milk; a rice pulau with a delicious creamy cashew base, walnuts, raisins, and other fruits and vegetables; and my favorite: aloo palak. Similar to palak paneer, but used baked baby potatoes instead of paneer, and an almond base instead of cream.
Everything was so delicious, very flavorful, and healthy (so much garlic, ginger, onion and vegetables). I’m not sure I am confident enough to cook these dishes on my own yet, although I plan to experiment on my family to see if I can come close. The secret ingredients, besides an experienced native chef, were all the spices.
I am very excited about building my skills around this naturally vegetarian (easily made vegan) and delicious cuisine. It uses so many vegetables, and even the kids love it.
If you know me, and wish you had been part of this event, let me know so that I can invite you to the next one!
I’m not going to share Rajesh’s secret recipes here (sorry)… but, I will post this delicious Chana Masala recipe from Minimalist Baker that my friend brought and was very popular. I also recommend Holy Cow Vegan, featuring many authentic Indian dishes.
Please let me know your best recipes that everyone loves!
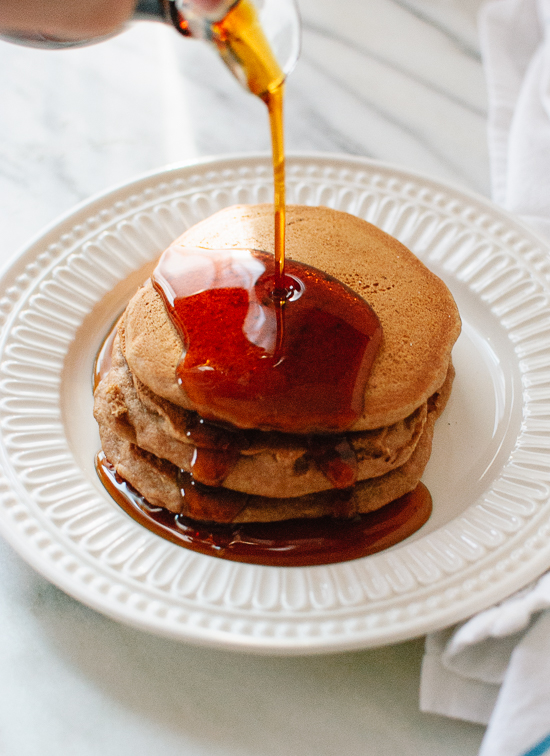
My husband resisted a bit when we cut out eggs and milk, mostly because he needs them to make pancakes for the kids.
He created this recipe based on one from Cookie and Kate that makes about 6 pancakes (about perfect for 2 kids). There may be many options out there, but he likes this one and is sticking to it! (Our photo to be added next time we make these)
INGREDIENTS
1 cup whole wheat flour (or regular)
1 T baking powder
¼ t salt
1 cup soy milk (or almond)
2 T vegetable oil
2 T maple syrup
1 t vanilla extract
More oil to grease your pan/skillet, if necessary
INSTRUCTIONS
In a mixing bowl, whisk together dry ingredients. In another bowl, whisk together the milk, oil, maple syrup and vanilla.
Pour the liquid mixture into the dry mixture. Stir until combined, so only a few lumps remain (don’t over-mix or your pancakes will be tough!). If you’d like to mix in any totally optional add-ins (like chocolate chips or blueberries), gently fold them in now. Let the batter rest for 5 minutes so your pancakes will be nice and fluffy.
Meanwhile, heat a heavy cast iron skillet or nonstick griddle over medium-low heat.
If necessary, lightly oil the cooking surface with additional oil or cooking spray.
Using about ¼-cup of batter at a time, cook for 2 to 3 minutes until small bubbles form on the surface of the pancakes, and flip. Cook on the opposite sides for 1 to 2 minutes, or until golden brown.
Repeat with the remaining batter, adding more oil as needed. You may need to adjust the heat up or down at this point. Serve the pancakes immediately.
I don’t think about wanting, or eating meat anymore. Could not care less about milk. Eggs kind of gross me out.
But cheese, that was probably the hardest hurdle for me to overcome when eating a plant-based diet. Usually, I just need to think of the baby calves who are not getting their mother’s milk, in order to stay strong. But I can’t deny that I used to love eating cheese.
I’ve given up on buying the standard soy vegan cheeses at the grocery store, most of them taste like plastic or wood a little. It’s just strange. Although recently the high-end nut-based ones are pretty delicious, but not cheap! Michikyo’s cheese and Vtopian cheese in particular as a semi hard French-style. Heidi Ho makes some yummy cheeses too.
I can skip cheese on most things like tacos, and I can make a decent mac n’ cheese or cauliflower alfredo myself.
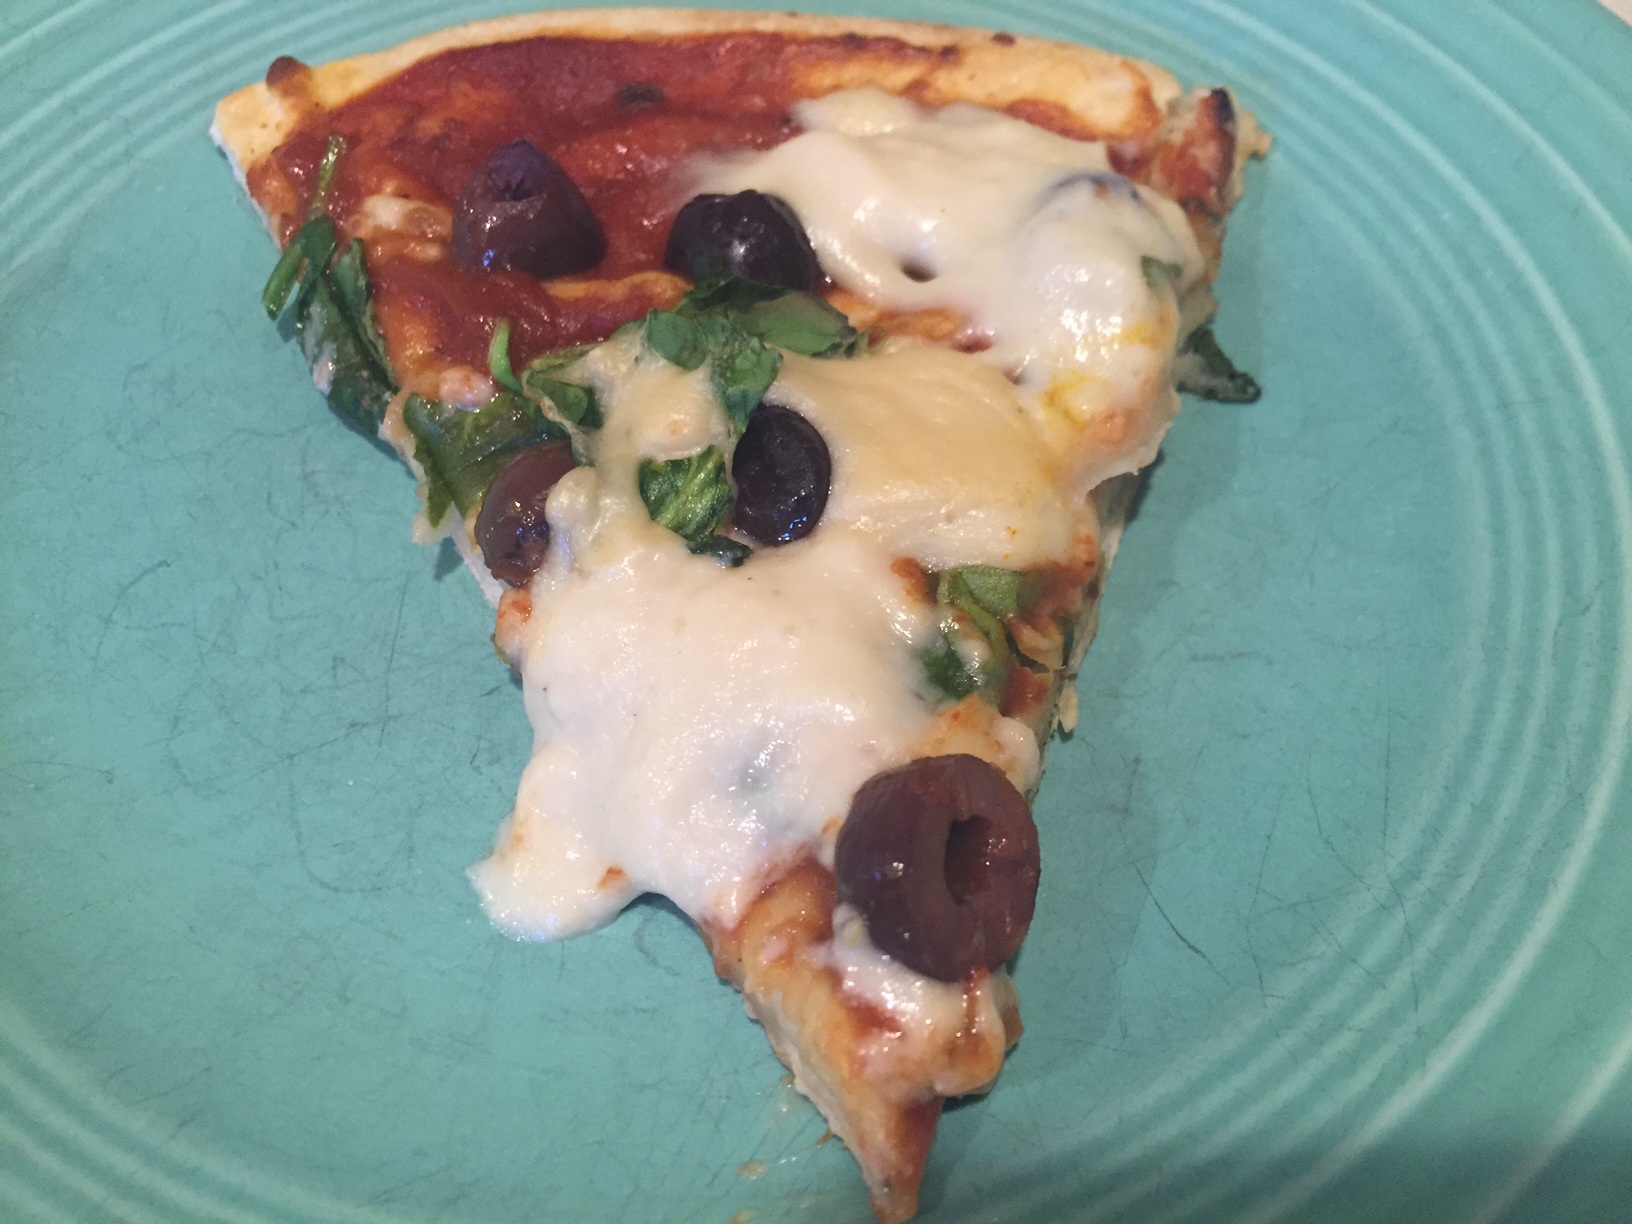
The one dish that really benefits the most from cheese is pizza.
In my search for making my own cheese I have two recipes by the same author. They are similar and have almost a velveeta quality (which I secretly love). Works perfectly on pizza or with nachos. I think it is best fresh and warm since it can gel up a bit as it cools.
3 Tablespoons Tapioca Starch (also known as Tapioca Flour)
3 Tablespoons Nutritional Yeast
2 Tablespoons Lemon Juice
1½ teaspoon Salt (or to taste)
1 teaspoon Paprika
¼ teaspoon Turmeric
½ teaspoon Onion Powder
¼ teaspoon Garlic Powder
1½ teaspoon White Miso Paste (or other light miso such as chickpea miso)
1 teaspoon Maple Syrup or Agave
Instructions
Soak the cashews for four hours or overnight. Or if you are impatient like me, just boil them for 10 minutes until soft. Drain before using.
Add the cashews the hot water, and all the remaining ingredients to a blender, and blend until smooth. It will be very watery.
Pour into a small sauce pan and heat over medium high heat, while stirring. If you don’t have a high powered blender, you may want to pour the liquid through a fine mesh strainer or cheese cloth into the pot, to remove any cashew bits that didn’t grind up. This will ensure a smooth cheese texture.
As you stir it will start forming clumps, and then all of a sudden it will become a cheesy gooey mass of yumminess. This takes about 5 minutes. Continue to cook and stir for an additional 2 minutes to make sure it has firmed up completely.
Use for anything you like! Make a big plate of nachos, load up a baked potato, make a grilled cheese sandwich, a vegan cheese burger, stir into pasta for a quick mac and cheese, or whatever your heart desires. Store in an airtight container in the fridge.
Best of all, these are easy to make, they take 5 minutes and I usually have all the ingredients on hand. And they are healthier than cheese.
3 Tablespoons + 2 teaspoons Tapioca Starch (also known as Tapioca Flour). I have used corn starch but tapioca is better.
1 Tablespoon of Nutritional Yeast
1 teaspoon Apple Cider Vinegar or Lemon Juice
½ teaspoon Salt
¼ teaspoon Garlic Powder
Directions
First boil or soak the cashews. To Soak the Cashews: cover with water and soak for 4 hours or overnight. To Boil the Cashews: Cover with water and bring to a boil for 10 to 15 minutes until tender.
Drain the cashews and add them along with the water, and all the remaining ingredients to a blender, and blend until smooth. It will be very watery.
Pour into a small sauce pan and heat over medium high heat, while stirring. If you don’t have a high powered blender, you may want to pour the liquid through a fine mesh strainer or cheese cloth into the pot, to remove any cashew bits that didn’t grind up. This will ensure a smooth cheese texture. As you stir it will start forming clumps, and then all of a sudden it will become a cheesy gooey mass of yumminess. This takes about 5 minutes. Continue to cook and stir for an additional 2 minutes to make sure it has firmed up completely. Use for anything you like! Scoop up with tortilla chips, dollop onto pizza before baking, make a grilled cheese sandwich, or whatever your hearts desire. Store in an airtight container in the fridge.
Notes
*If you want to return the cold mozzarella back to dipping consistency, reheat over medium heat while stirring constantly so it doesn’t burn. Once it is hot and bubbling it might have thickened up too much. You can thin it out by adding a tablespoon of water at a time, stirring it in until desired consistency is reached.
Take a look at It Doesn’t Taste Like Chicken‘s delightful website for more inspiration and reasons to kick the dairy. Please let me know if you try one of her other 16 recipes!
I have two kitchen items that I rely on consistently. I would hesitate to call them gadgets, they are more like my mainstay appliances, especially for all the fruits and vegetables we eat.
The first is my Vitamix. At first I thought it seemed silly to spend hundreds of dollars on a blender. But, I use it almost every single day, and sometimes twice a day. I can pulverize nuts into milk or butter, make soups, sauces, ice cream and smoothies so easily and quickly. I bought mine refurbished at a Whole Foods demo for much less than a brand new one. It looks brand new and has a warranty, recipe book, etc. It can be a little intimidating with it’s power- but I find that is a good thing since it keeps other people from using it! The clean up is so easy- just blend some dish soap and water to clean it.
It is awesome, and everyone who has it swears by it. Only downside is also why it is amazing- it is so powerful! I may need a food processor as well for some recipes. It is easy to over-process food in there and start making peanut butter when you just need to grind up nuts, or turn salsa into soup. That may also just be user error, hmmm. I thought I had broken it once when it turned off suddenly, but fortunately, it was the built-in feature that will shut the machine down rather than let it overheat. After it cooled down, it was fine.
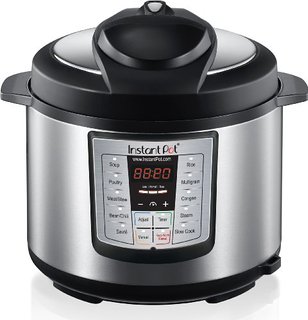
The other tool I use the most is a recent purchase: the Instant Pot. I don’t remember how I heard about this. It is an electric pressure cooker that allows me to make beans, rice, lentils, soup, slow cooker recipes, steel cut oats, vegetables in record time. It also seals in their flavors while cooking in a way that makes everything taste better. I’m still earning to use it, but I have been using it almost every day as well. Apparently, you can even make yogurt in the model that I chose. It speeds cooking time by 2-10 times, and reduces energy use by 70%. I chose the DUO60, 7 in 1, 6 Qt model. I think if you don’t need the yogurt function and make smaller quantities, you could get a less expensive one.
It wasn’t cheap- but much less than the blender- around $100. I am really enjoying it, and how much easier it makes cooking. My mother-in-law gave us a stove top pressure cooker years ago but I never used it. I was afraid of the metal thing that was shaking, and stuff whistling, all the different movable parts, and fear of a giant explosion (which does happen). The electric one has safeguards in place to ensure that you can’t remove the lid while it is under pressure. There is an Instant Pot Vegan Facebook page with recipes, and a lot of Indian cooking uses this method (my favorite).
I’ll probably start posting some recipes from my Instant Pot. Basically, the only drawback I have seen so far is that you have to learn how long things take (always refer to a book). Since you can’t just peek in while it is cooking, you can under cook or overcook vegetables. It has the sauté feature at the beginning, which allows you just to cook onions or something with the lid off first. One of the best features is that it is very easy to clean- just one stainless steel pot.
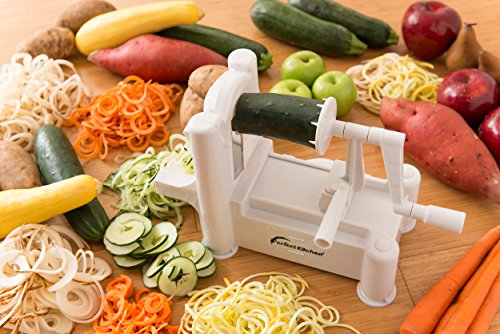
I hope to get some vegan pressure cookbooks to try next month and will update this post with my favorites. My mom is the Queen of Kitchen Gadgets. Many have been very helpful, like the Vidalia Chop Wizard. She has a pasta maker, mandolin, juicer, everything… Her latest recommendation is the spiralizer to make raw noodles, curly fries, etc.
I will find out what brand, but it is a way to make eating vegetables very attractive.
What is your favorite gadget/tool that makes your life easier?
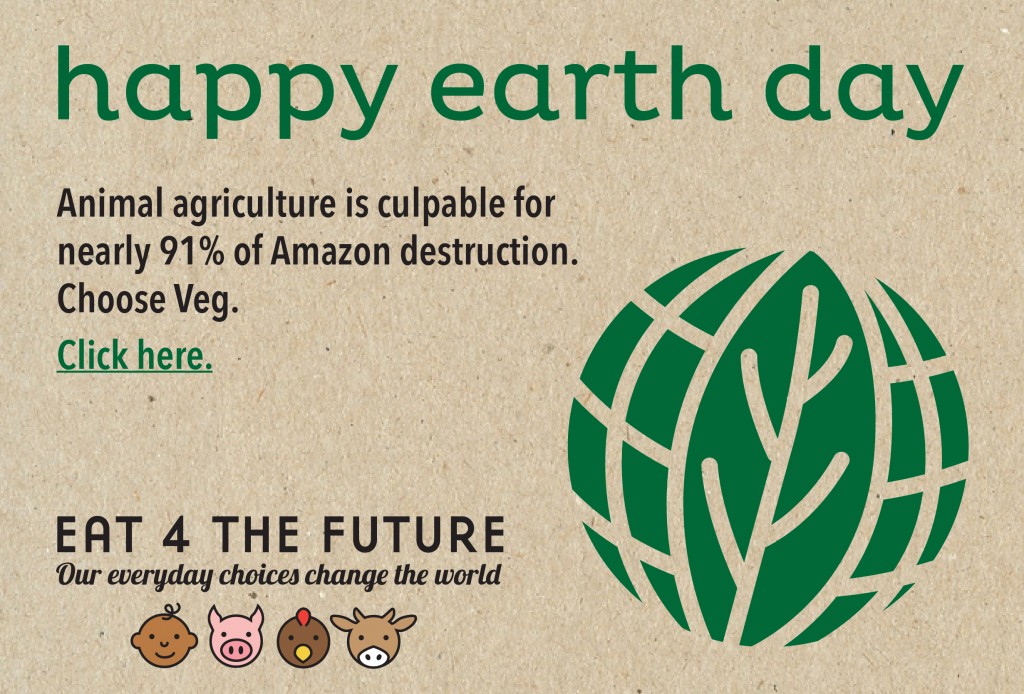
I celebrate Earth Day every day in some way, and it feels great. The more people join forces together, will make it even easier. From saving water to battling climate change, making your diet “greener” is something everyone can do! Click on the graphic below to learn 7 ways your food choices can help the planet for people and animals.
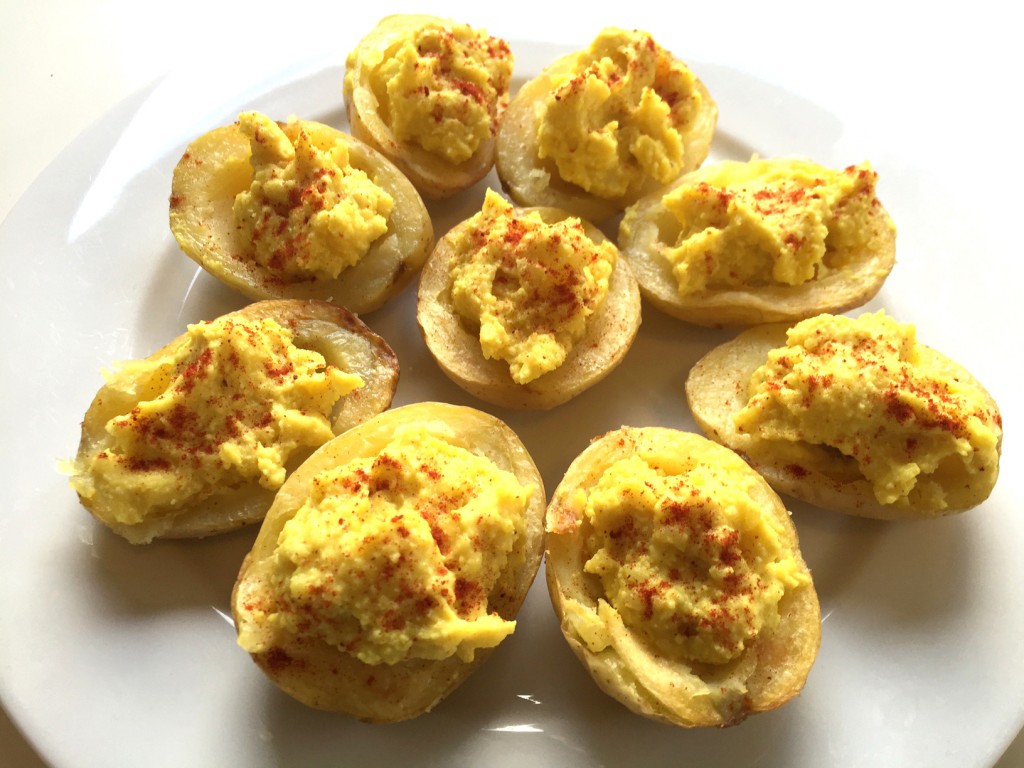
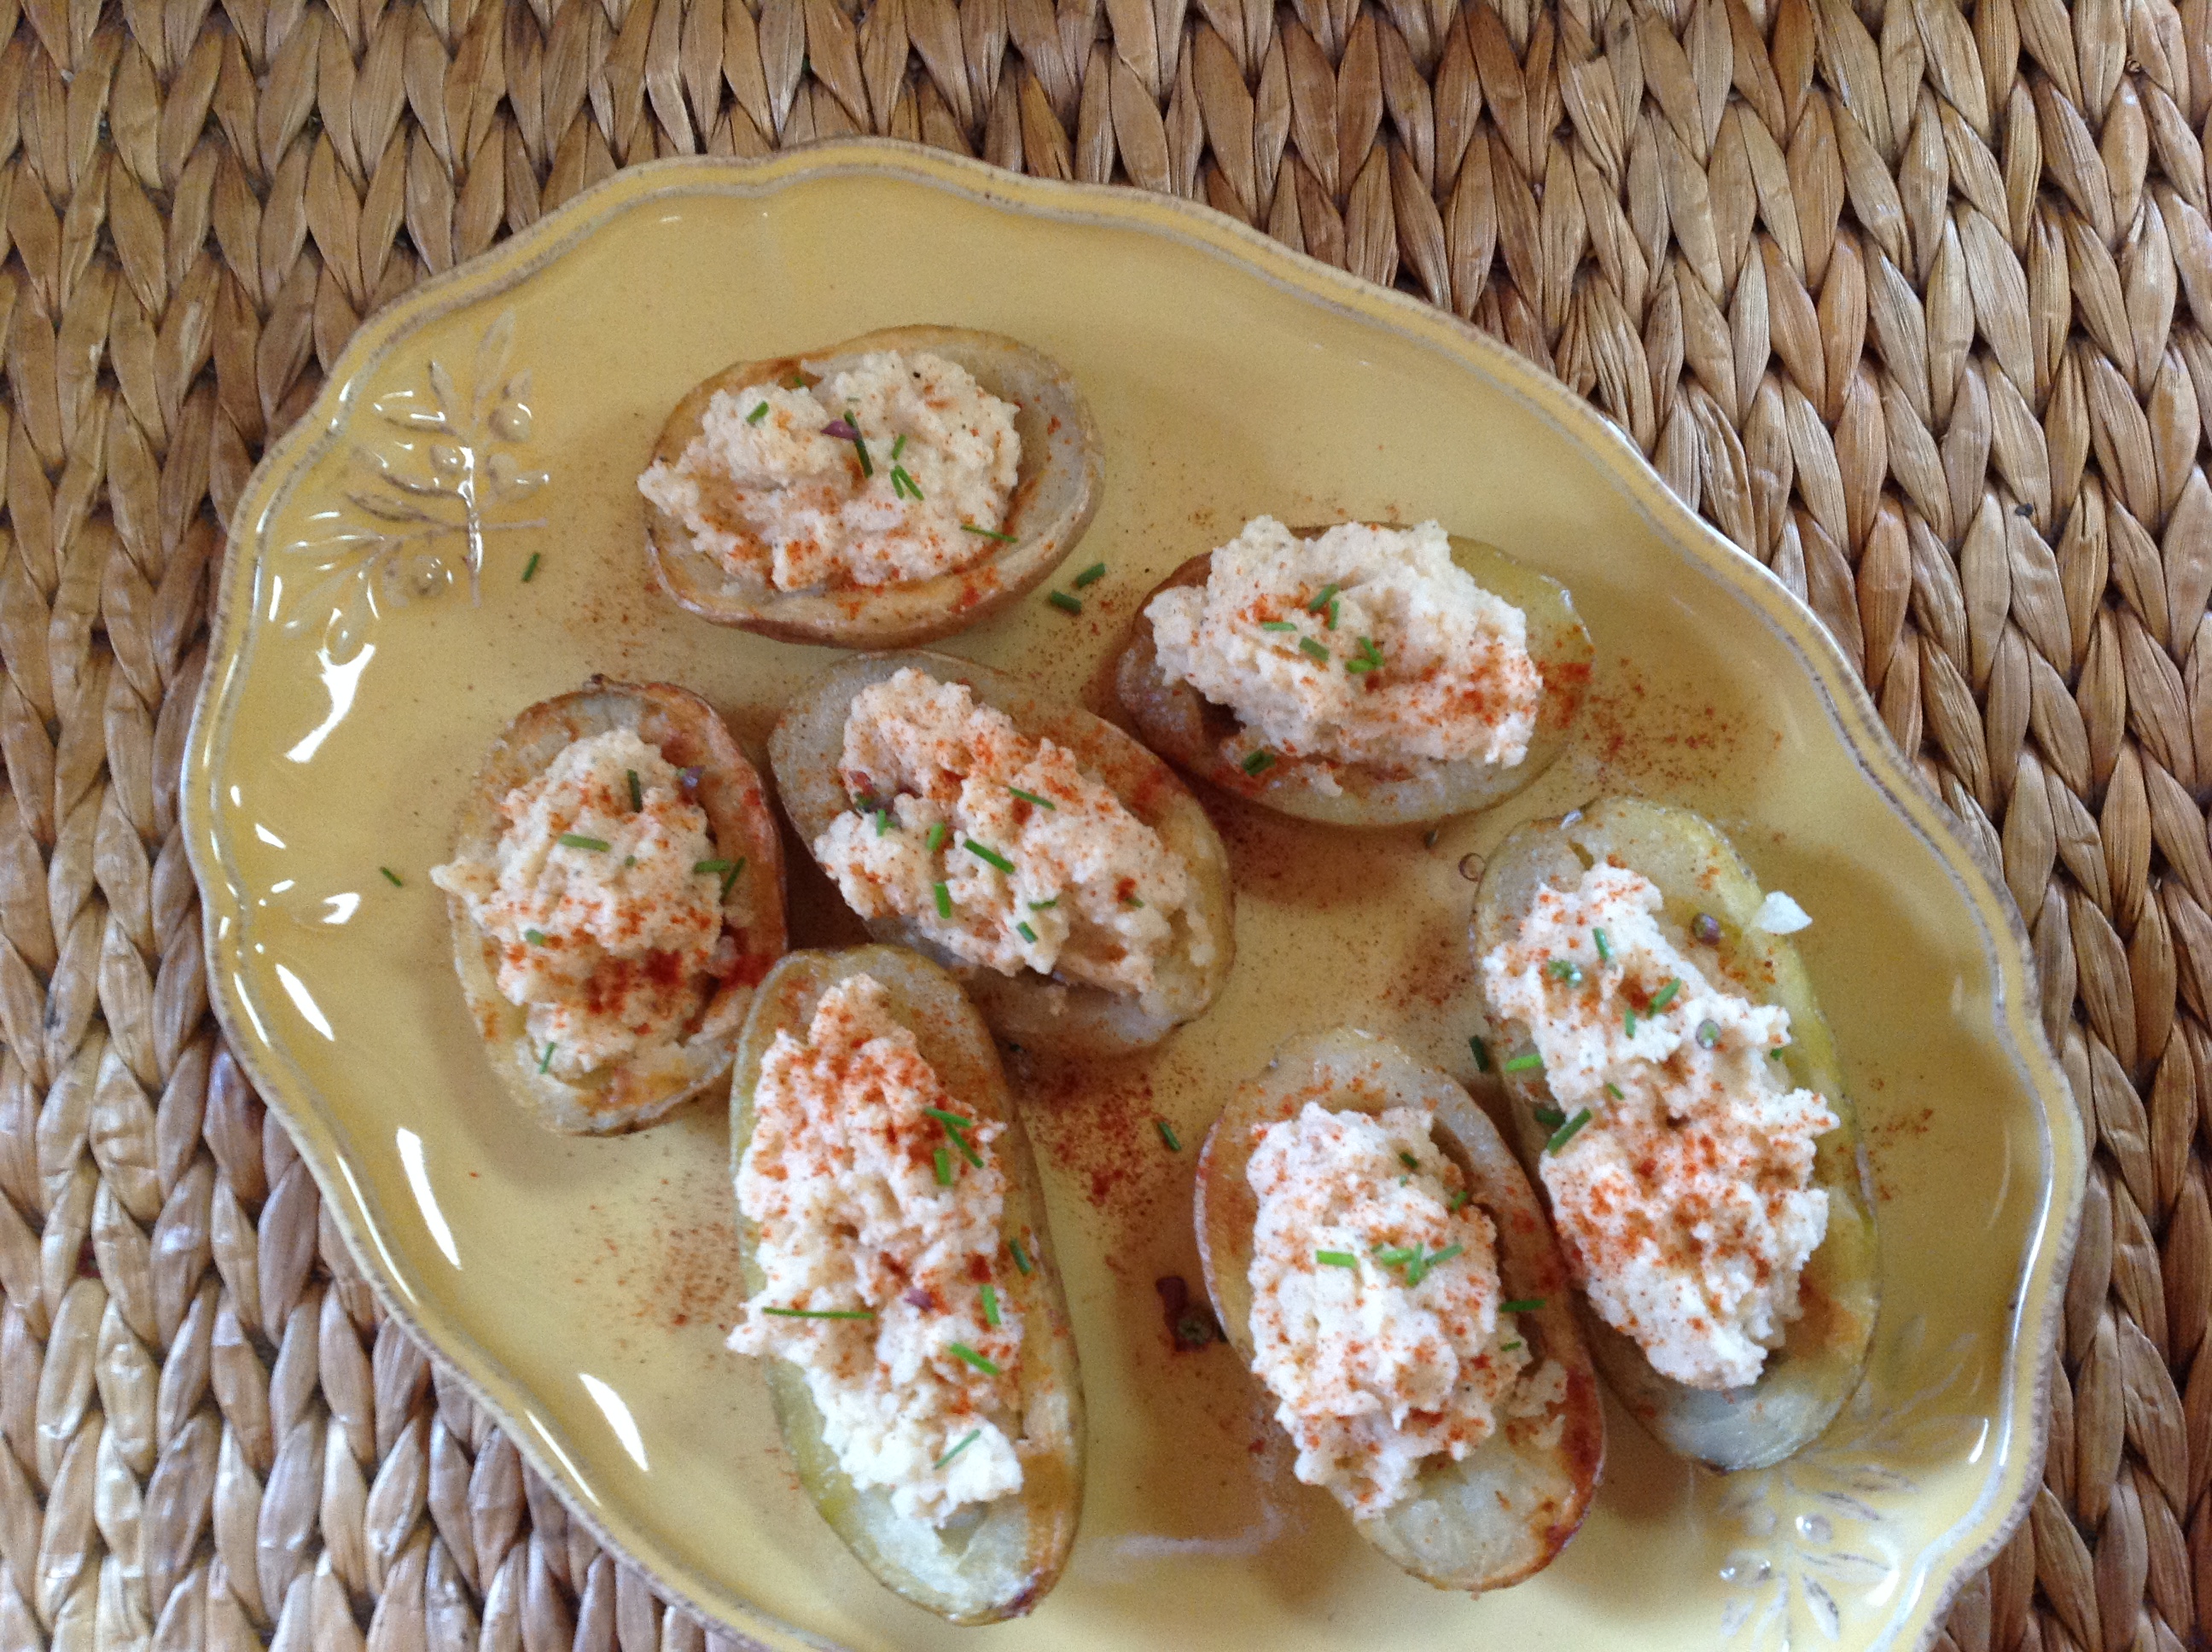
1 1/2 pounds small thin-skinned potatoes, like yukon gold (about 10)
1 tablespoon olive oil
1/2 cup cashews or almonds, soaked in boiling water for half an hour. If using almonds, remove skins.
3/4 cup water (or veg broth)
1/2 teaspoon turmeric
1 teaspoon kala namak Indian black salt (or 3/4 teaspoon regular salt)
2 teaspoons fresh lemon juice
1/8 teaspoon black pepper
For garnish:
Sweet paprika
1. Preheat oven to 350 Fahrenheit. Line a rimmed baking sheet with parchment paper.
2. Slice potatoes in half the long way and place on baking sheet. Drizzle with olive oil and sprinkle with a pinch of salt. Rub potatoes to coat, and place cut-side down on the baking sheet. Bake for 30 minutes, until potatoes are tender.
3. In the meantime, drain the nuts and place them in the blender with water, turmeric, salt, lemon juice and pepper. Blend until completely smooth, scraping the sides of the food processor with a spatula occasionally to make sure you get everything. This could take 1 to 5 minutes depending on the strength of your blender.
4. When potatoes are tender, remove from the oven. When cool enough to handle, but still hot, scoop the centers out with a melon baller or rounded teaspoon, leaving about 1/4-inch lining of potato inside.
5. Place the scooped out potato into a mixing bowl and mash until smooth. It’s important that they’re still warm so that they mash well. Add the “yolk” cream mixture, and continue to mash until well incorporated. Chill in the fridge for about 30 minutes so that the mixture stiffens up.
6. Once cool, scoop back into potatoes. Sprinkle with paprika.
The special salt, and the paprika garnish really added to this. Everyone really liked it, and it was much more delicious than my photo represents! Would be fun to bring to a party, or serve as an appetizer. We ate them as a side course.